
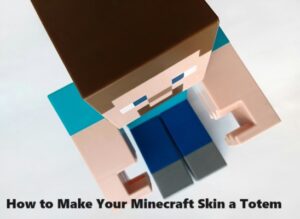
Hey Minecraft Pro! Want to know how to make your Minecraft Skin a Totem? If you want to make a super cool totem skin for your character. Follow these easy steps to make your Minecraft guy look like a totem pole!
You will agree in Minecraft, your character’s skin is a unique way to express your creativity and personal style. While plenty of pre-made skins are available, making your own skin can be a fun and rewarding experience. In this blog post, I will guide you on how to create a Minecraft skin that resembles a totem.
Research and Inspiration
The first step to making your Minecraft Skin a Totem is to do research and find the inspiration. It’s a good idea to do some research and gather inspiration. Look up images of totems from various cultures and explore different designs. This will help you get a better idea of what you want your totem skin to look like.
Choose the best Skin Editor for your Minecraft Skin.
Once you have decided on the design of your totem, you’ll need to choose a skin editor. There are several online editors available, such as Novaskin, Skindex, and Minecraftskins. Pick one that you find user-friendly and suits your needs.
After this, the step for designing the Totem for your Minecraft Skin starts.
- Start with a Base – When you open the skin editor, you’ll see a blank template of the Minecraft character. This template consists of different body parts, including the head, body, arms, and legs. Start by selecting the body part you want to begin with, such as the head.
- Design the Totem Face – To create the totem face, use the editor’s tools to add shapes, colors, and patterns. You can experiment with different facial features like eyes, nose, mouth, and any additional details you want to include. Don’t be afraid to get creative and make your totem face unique.
After designing the face, move on to the body.
Totems often have intricate patterns and symbols carved into them. Use the editor’s tools to add these patterns to the body of your Minecraft character. You can also incorporate different colors to make the design more vibrant.
Design and Define the Arms and Legs of your character
Next, focus on the arms and legs of your character. You can continue the body patterns onto these areas or create a different design altogether. Remember to consider how the patterns will align when the character is in different poses.
Once you’ve completed the main design, take a step back and evaluate your totem skin. Make any necessary adjustments or refinements to ensure all the elements work together harmoniously. Pay attention to the overall balance and symmetry of the design.
Now Save and Apply.
When you’re satisfied with your totem skin, save it in the skin editor. Most editors will allow you to download the skin as an image file. Once downloaded, go to the Minecraft website or launcher and navigate to the skin settings. Upload your totem skin and apply it to your character.
Now that you have successfully created your totem skin, it’s time to show it off to the Minecraft community. Join multiplayer servers, share screenshots on social media, or participate in skin contests to showcase your unique creation.
Conclusion
Creating a Minecraft skin that resembles a totem is a fun and creative way to personalize your character. With the help of online skin editors and your imagination, you can bring your totem design to life. So, go ahead and unleash your creativity to make a totem skin that stands out in the Minecraft world!